A demonstration of redundancy in D2000 systems on the Raspberry PI platform.
Since the more you eat, the more you want, I decided to try connecting two RPIs into one redundant system.
Redundancy is a strong tool of the D2000 system that eliminates system outages during unforeseen failures or necessary temporary shutdowns of one of the servers, for example when performing maintenance or prophylactic operations.
When one of the two servers is non-functional, the other one – configured as a member of a redundant group – immediately takes over the control of the whole system. It becomes the HOT server of the redundant group.
The same way as I got the D2000 system on the RPI working, I configured one more RPI.
I did not forget to remember the IP addresses of individual RPIs while installing.
The order should be in everything, so let’s name both RPIs properly.
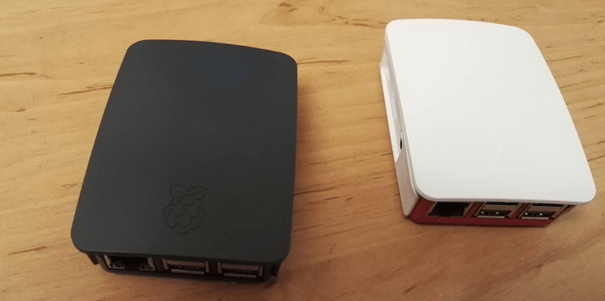
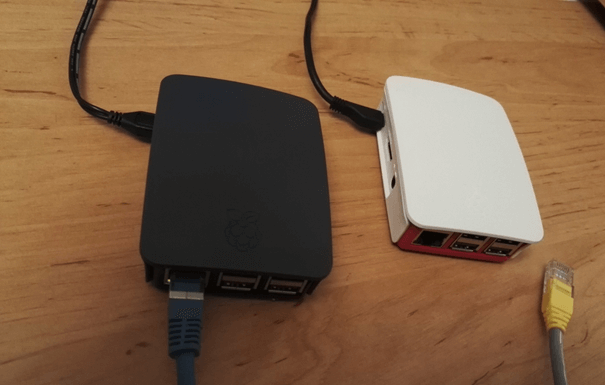
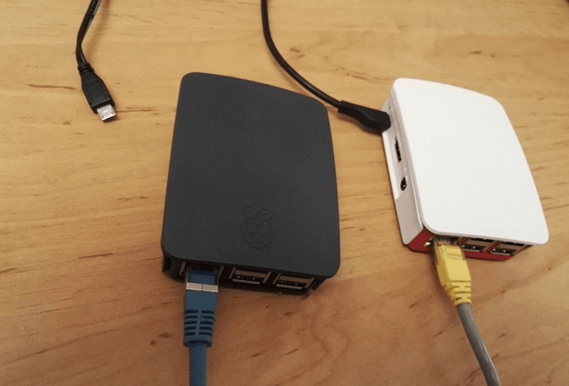
The first RPI server is in the white box.
That is why I chose the name rpi_white.
After the basic configuration, I wrote down its IP address – 192.168.2.84.
The second one is in the black box, so the name was obviously rpi_black and again I wrote down its IP address – 192.168.2.106.
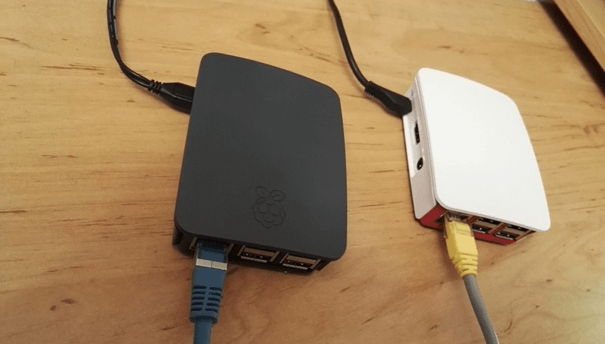
I let both RPIs running and connected them to my home LAN network.
Since I already knew both IP addresses of both RPIs, I didn’t need to have keyboards and mice connected to them. I did the entire configuration using remote access – via the network through putty.
By entering the command putty 192.168.2.84 into the command prompt (cmd) of my notebook, I connected to the white RPI. I logged in as a pi user using the password raspberry.
By the command sudoraspi-config, I started the RPI configuration tool.
Through the second item of the main menu 2 Network Option, I picked the submenu first item N1 Hostname.
I read the following Information window about allowed conventional terminology for the RPI and confirmed by the button <Ok>.
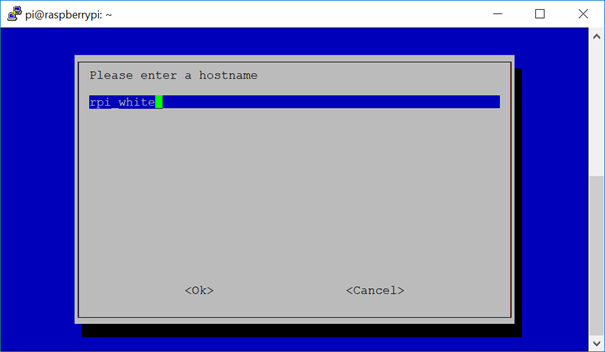
After confirming the given name and a necessary restart of the RPI, the RPI booted already with the new name rpi_white.
By the same method through putty 192.168.2.106, I renamed also the second RPI – black RPI got the name rpi_black.
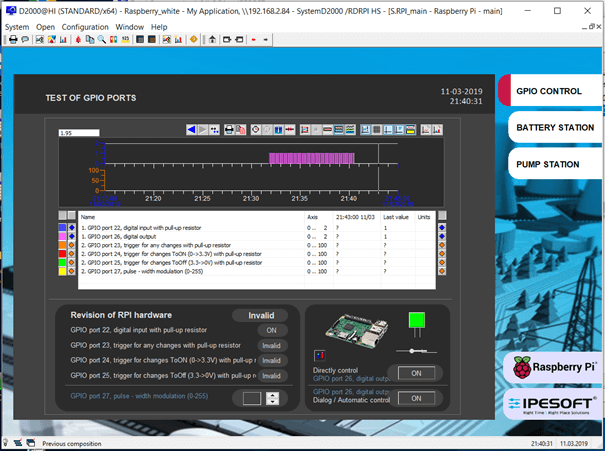
By a test connection of the HI client from my notebook to individual RPI servers, I verified that everything was alright.
hi /S192.168.2.84
hi /S192.168.2.106
In both cases, the D2000 testing schemes showed up so atthat moment we had two running, mutually unconnected functional D2000 systems.

Through the System console, we can not only see to which redundant group the server belongs to, but we can also control the role of servers within the redundant group – that means we can switch the roles of servers from SBS to HOT.
After installing both RPI servers, we saw two D2000 servers rpi_black and rpi_white which were not yet put into the redundant group.
So, for the servers can work in redundancy, I had to interconnect them configurationally.
First, I defined the name of the redundant group – ‘RPI’ – then I assigned names to both kernels which were supposed to form a redundant group.
I assigned a name to the kernel in white box ‘white’ and to the kernel in black box ‘black’.
Subsequently, according to the manual, I added all the necessary configuration parameters for redundancy into the file /opt/d2000/app/myapp/application.properties.
By the command
sudo nano /opt/d2000/app/myapp/application.properties
I opened the mentioned configuration file for the editing.
The section of parameters necessary for D2000 redundancy was not in there.
I had to copy this section form the help, added it to its end and modified to my values:
Kernel.Redundancy.GroupName = RPI
Kernel.Redundancy.KernelName = white
Kernel.Redundancy.State = SBS
Kernel.Redundancy.Priority = 3
Kernel.Redundancy.RD_TIMEOUT_iElection = 7
Kernel.Redundancy.RD_TIMEOUT_iWaitingHot = 10
Kernel.Redundancy.RD_TIMEOUT_iWaitingReadyHot = 120
Kernel.Redundancy.RD_TIMEOUT_iStartingKernelToSBS = 120
Kernel.Redundancy.RD_TIMEOUT_iStartingKernelToHOT = 120
Kernel.Redundancy.RD_TIMEOUT_iHotOrSBSToSBS_WaitForHot = 10
Kernel.Redundancy.RD_TIMEOUT_iHotOrSBSToSBS_WaitAnsConn = 20
# NetCheck_Ping
Kernel.Redundancy.NetCheck_Ping1 = 192.168.2.106
Kernel.Redundancy.NetCheck_Ping2 = 192.168.2.252
#Kernel.Redundancy.NetCheck_Ping3 = 10.12.01.253
#Kernel.Redundancy.NetCheck_Ping4 = 10.12.65.253
#Kernel.Redundancy.NetCheck_Ping5 = 10.12.01.254
#Kernel.Redundancy.NetCheck_Ping6 = 10.12.65.254
Kernel.Redundancy.NetCheck_Ping_TIME_OUT = 3000
In the file, we can see configurational lines starting with the symbol „#“. Lines labelled in such a way serve as commentaries, meaning that lines not necessary for current configuration are labelled in this way.
As the value of the parameter Kernel.Redundancy.NetCheck_Ping1 , I put the IP address of the second RPI, in the black box, and the value of the parameter Kernel.Redundancy.NetCheck_Ping2 I put the IP address of the router of my home LAN network.
Similarly, I adjusted the mentioned configurational file for the RPI in the black box. (I list only parameters that needed to be changed):
Kernel.Redundancy.GroupName = RPI
Kernel.Redundancy.KernelName = black
Kernel.Redundancy.Priority = 2
Kernel.Redundancy.NetCheck_Ping1 = 192.168.2.84
Kernel.Redundancy.NetCheck_Ping2 = 192.168.2.252
Kernel.Redundancy.NetCheck_Ping1 = 192.168.2.84 – I analogically put the IP address of the RPI in the white box.
For the configurational parameters to be valid, I restarted both RPIs.
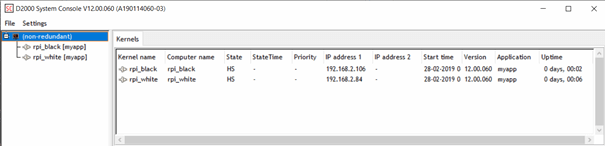
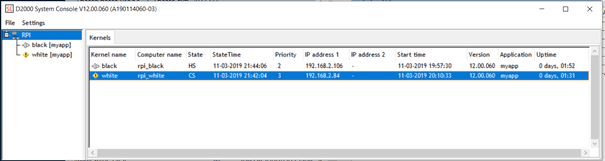
Through the system console, I saw that both servers are connected in the RPI redundancy.
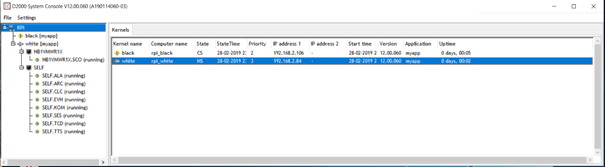
The server rpi_white was started as the first server and that is why it was set as a HOT server.
The second server rpi_black, however, cannot connect to redundancy. When trying to synchronize configuration databases, it reaches the Crash state (the State has value CS – Crash State).
There are more reasons why the server started as the secondone cannot be connected to redundancy – configurational and license reasons.
Firstly, it was necessary to configure on both RPIs PostgreSQL for running D2000 in redundancy.
Configuration of PostgreSQL
For the security reasons, by default the database server is not available from other computers in the network. In our case, for running D2000 in redundancy it is necessary for the database server to be available from the second RPI server – so that configuration databases can be synchronized during startup.
On individual RPIs, I set these rules by using the command
sudo nano /etc/postgresql/9.6/main/pg_hba.conf
It was done in the following manner: on the rpi_black device, I added the rule
host all dba 192.168.2.84/32 password
and on the rpi_white device the rule
host all dba 192.168.2.106/32 password
By this rule, I permitted access to the PostgreSQL database from the second D2000 server.
The setting of the DSN
I did the setting of the DSN for the remote database by adding ODBC DSN into /etc/odbc.ini file on both redundant nodes.
sudo nano /etc/odbc.ini
On the black RPI, I added the DSN definition for the access to a configuration database on rpi_white:
[myapp.white.SYSCFG]
Description = PostgreSQL connection to app_syscfg
Driver = PostgreSQL Unicode
Database = myapp_syscfg
Servername = 192.168.2.84
UserName =
Password =
Port = 5432
Protocol = 7.4-2
ReadOnly = No
RowVersioning = No
ShowSystemTables = No
ByteaAsLongVarBinary= 1
BoolsAsChar = 1
TextAsLongVarchar = 1
UseServerSidePrepare= 1
UpdatableCursors = 1
UniqueIndex = 1
Fetch = 1000
ConnSettings =
On the white RPI, I added the DNS definition for the access to a configuration database on rpi_black:
[myapp.black.SYSCFG]
Description = PostgreSQL connection to app_syscfg
Driver = PostgreSQL Unicode
Database = myapp_syscfg
Servername = 192.168.2.106
UserName =
Password =
Port = 5432
Protocol = 7.4-2
ReadOnly = No
RowVersioning = No
ShowSystemTables = No
ByteaAsLongVarBinary= 1
BoolsAsChar = 1
TextAsLongVarchar = 1
UseServerSidePrepare= 1
UpdatableCursors = 1
UniqueIndex = 1
Fetch = 1000
ConnSettings =
Note: the name of DSN must respect the convention <application_ name >.<kernel_ name >.SYSCFG
The last reason why redundancy did not work was the license restrictions.
Requesting the license for the work in redundancy
The installed version of the D2000 RPI works in a DEMO mode and one of the restrictions of the DEMO mode is that there is no support for redundancy of D2000 servers.
Step by step, I generated a file on every RPI with hardware imprint by running
sudo /opt/d2000/bin/hwinfo
Files with the information about HW were created at individual servers:
info_rpi_black_2019-02-26.hwi , for the RPI in a black box
info_rpi_white_2019-02-26.hwi, for the RPI in a white box
I sent these files to the Ipesoft company, on the basis of which there were generated license contracts LicenceRun.code in a short time. After receiving these files, I copied them on the RPI into /opt/D2000 directory.
By these steps, servers were configurationally ready with a valid license for working in redundancy.
I restarted both RPIs.
Warning – the first started server automatically becomes an active one (HS – Hot Server). The second server connects to it and becomes a backup one (SBS - Standby Server). While connecting, synchronization of configurational databases takes place – the configuration of HS is copied into the configuration of SBS. So, if you have something in the configuration database of the second server you don’t want to lose in the process of synchronization, I recommend to backup the database, or else do XML export of objects in it.
After starting both RPIs, I logged in to the HOT server through the system console using the name and password SystemD2000.
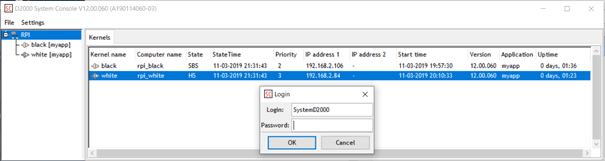
Both servers were engaged in the redundant group RPI. In the left part of the window, information about the parametersof both servers was displayed. The server rpi_white had the role of Hot Server (HS) since it was started first.
I connected the client process hi.exe to the redundant group: hi.exe /RDRPI
I tried switching the role of the server in the system console.
More interesting was the emulation of the network outage – by pulling out the LAN cable of individual RPIs.
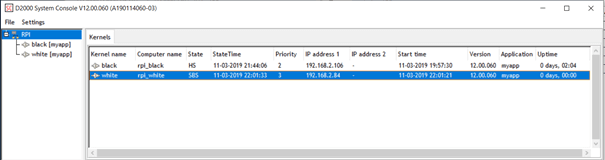
First, I pulled out the LAN cable of the white RPI.
The system console showed this:
The computer rpi_black took over the role of the active server.
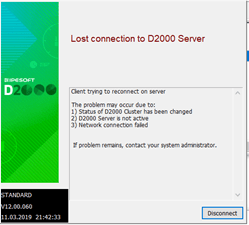
The client process hi showed for a few seconds – until the new server became the HOT server – an information window about the loss of connection. Then, the window of hi.exe process showed up again.
Further, we simulated the reconnection – we reconnected the LAN cable.
Both servers were running, but in comparison with the beginning of the simulation, the roles of servers were reversed.
Similarly, we simulated an outage of the whole server – by disconnecting the power supply of the rpi_black.
Through the system console, we saw the rpi_whiteserver taking over the role of HS.

After reconnecting the power supply, starting the server and connecting to redundancy again, everything was back to normal.
I successfully tried connecting two RPIs into one redundant system. Testing outages of connection and power supply was also successful. The second server always reliably took over the control role of the HOT server in the redundant group.
Conclusion
Redundancy of D2000 application servers enables to create a control system which will be reliable thanks to redundant servers (two, three or more according to needs). For small applications, it is possible to use Raspberry IP platform or else industrial variants, such as NPE X500 by Techbase company.
Besides redundancy of application servers, D2000 also supports redundancy of communication paths, archives, communication processes and other processes. One can use these features on every supported platform – including the Raspberry PI.
