Is it possible to run SCADA on Raspberry PI? We installed and configured D2000 on RPI and tested its capabilities. In this tutorial we give you a detailed step-by-step guide how to utilize Raspberry PI for running SCADA and other systems.
How to run SCADA on Raspberry PI?
I bought the Raspberry Pi (RPI) on AliExpress also with the small box. I’ve already had more efficient (around 5V/2A) power supply to a mobile phone, charging cable with micro USB connector and microSD card form a mobile phone. I didn’t have to buy those.
Preparing an RPI image
I proceeded according to the procedure described in online manual. At first, I downloaded around 550 MB image of the whole system with installed D2000. After a successful download of the system image, I unpacked the file.
To copy the image to a micro SD card, I downloaded the Win32DiskImager utility. After launching Win32DiskImager, I entered the path to the unpacked system image RPI_D2000_current.img and set a destination (Device) – the drive representing the micro SD card in the card reader.
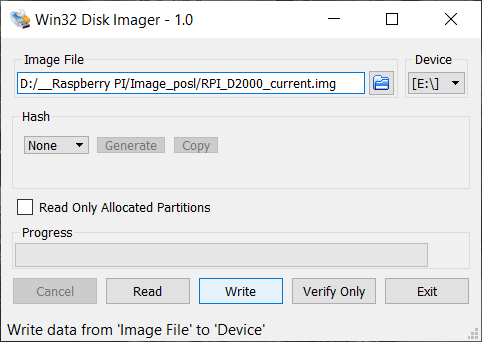
Clicking the button Write started the writing of the picture on the micro SD card. It took only about 2-3 minutes. After finishing the writing, I concluded work with the utility by clicking the button Exit. I was wondering how the image was saved on the SD card. I ran the Disk Management on Windows 10 (diskmgmt.msc).
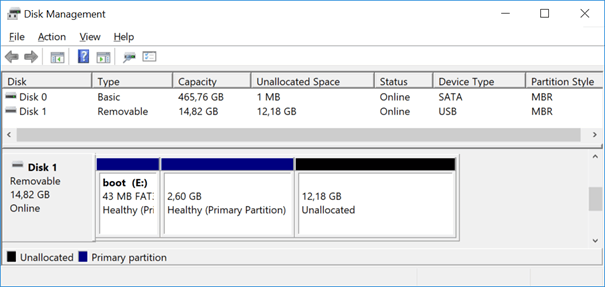
We can see here that the system doesn’t use all the capacityof the SD card. In the manual, there is stated that system area can be expanded even after logging into the RPI using configuration utility.
Configuring a Raspberry PI with a new image
I put the micro SD card into the RPI. Using HDMI cable, I connected the RPI with a classical computer monitor, added a keyboard and mouse, inserted LAN cable, and added a charger through a micro USB cable.
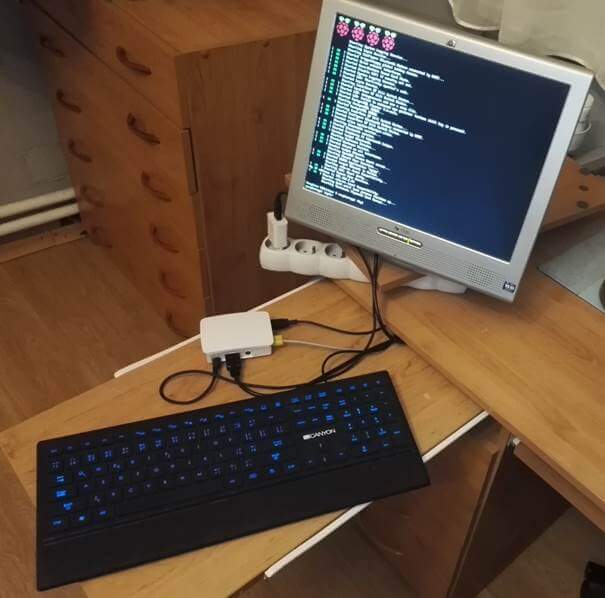
In a short time, the RPI booted from the SD card. I went over the information displayed during system start. I noticed a row with a text ‘My IP address is 192.168.2.84’ – that is the IP address assigned to my RPI by a router.
I need to know this IP address if I want to log in remotely someday using D2000 HI, D2000 CNF, GrEdit, Sysconsole and so on. I can also use it for example for the administrationof my RPI using telnet client putty, so I could administrate my RPI form my notebook from now on. I remember this IP address as I will need it.
Through login dialog on the screen of the monitor, I logged as a default user pi with the password raspberry. I checked the correctness of system time by date command. Since the system returned the incorrect system time, I added the IP address of time server using manual. Just out of curiosity, I verified whether the IP address of my RPI is correct.I entered the command ifconfig eth0 – IP address of my RPI was really 192.168.2.84 and network mask was 255.255.255.0.
By the command sudo nano /opt/d2000/instance.properties, I edited the configuration file /opt/d2000/instance.properties to enter this IP address and network mask.
I changed the IP address in the row to mine
IPAddr1 = 192.168.2.84
and changed the network mask
IPMask = 255.255.255.0
and saved the file by keyboard shortcut Ctrl+O and ended the editor by Ctrl+X.
By the command sudo raspi-config, I launched the configuration tool of the RPI. In the menu, I chose the item ‘7 Advanced Options’ and then ‘A1 Expand Filesystem’. Performing this operation, the system was prepared for expanding of system area, so the whole SD card could be used. After clicking ‘OK’ I ended the configuration tool by clicking the button ‘Finish’. The file system was expanded on the whole SD card and then I agreed to restart.
This way, I finished the configuration of the RPI.
D2000 Thin Client running on a RPI
I continued with further operations on my computer (demonstration of the thin client is shown also on my mobile phone).
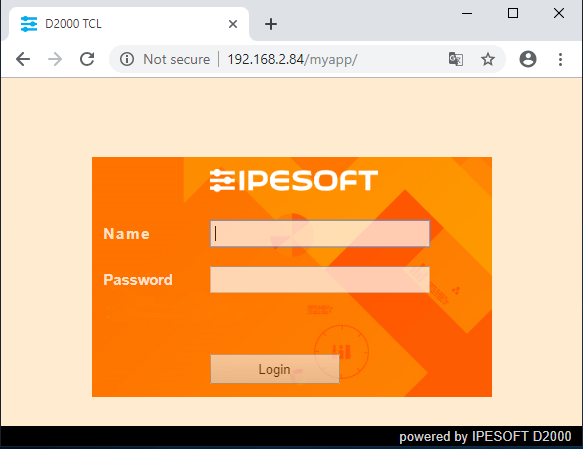
According to the manual, the installation on the RPI contains D2000 with pre-configured application myapp. And also the thin client should be working. The IP address, which we found out in the previous steps, is entered into a web browser – I entered http://192.168.2.84/myapp. I got into the login dialog of the thin client. Using it, I can connect to the web interface of D2000 server running on my RPI.
(Editor's comment January 2025: for newer D2000 versions, myapp in URL should not be specified, i.e. the address should be http://192.168.2.84).
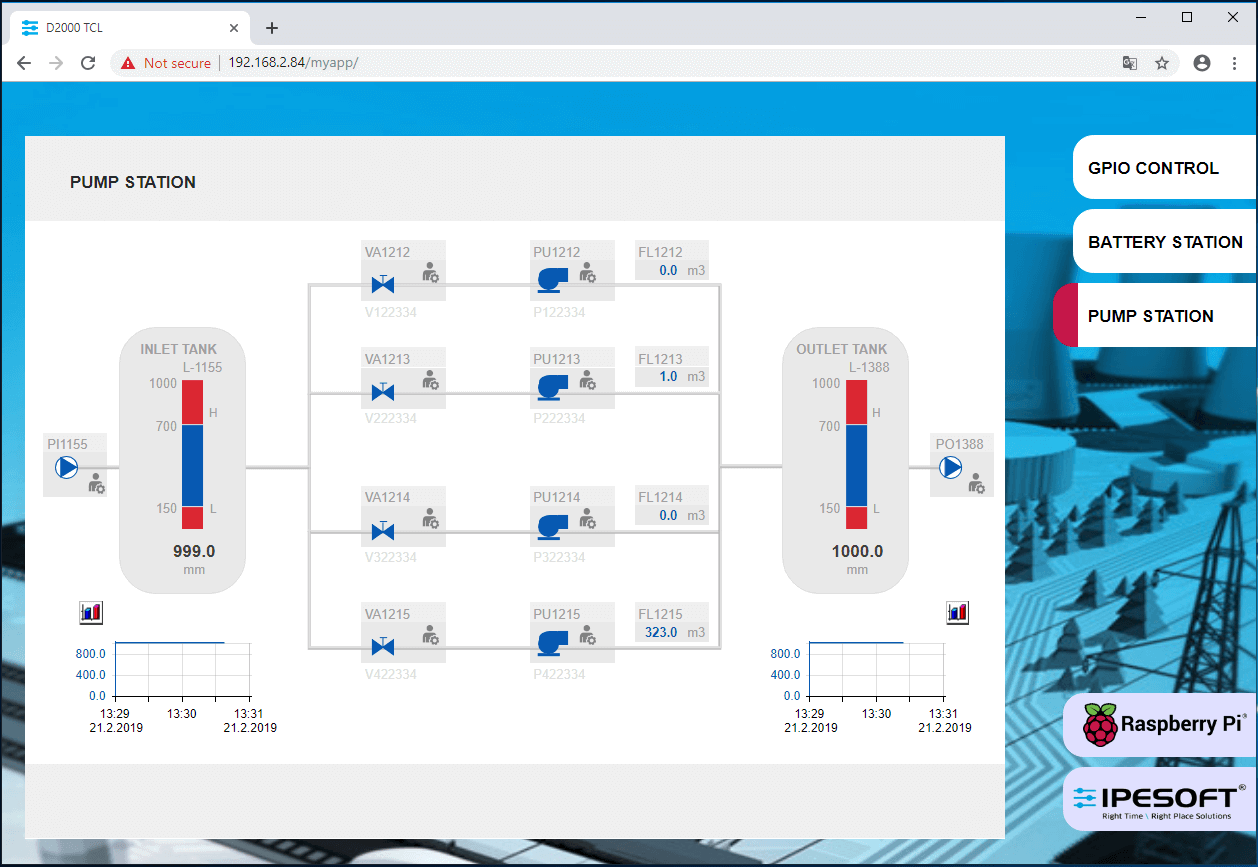
I logged into D2000 application using SystemD2000 as both access name and password. After a successful login, the demo test scheme of the thin client appeared.
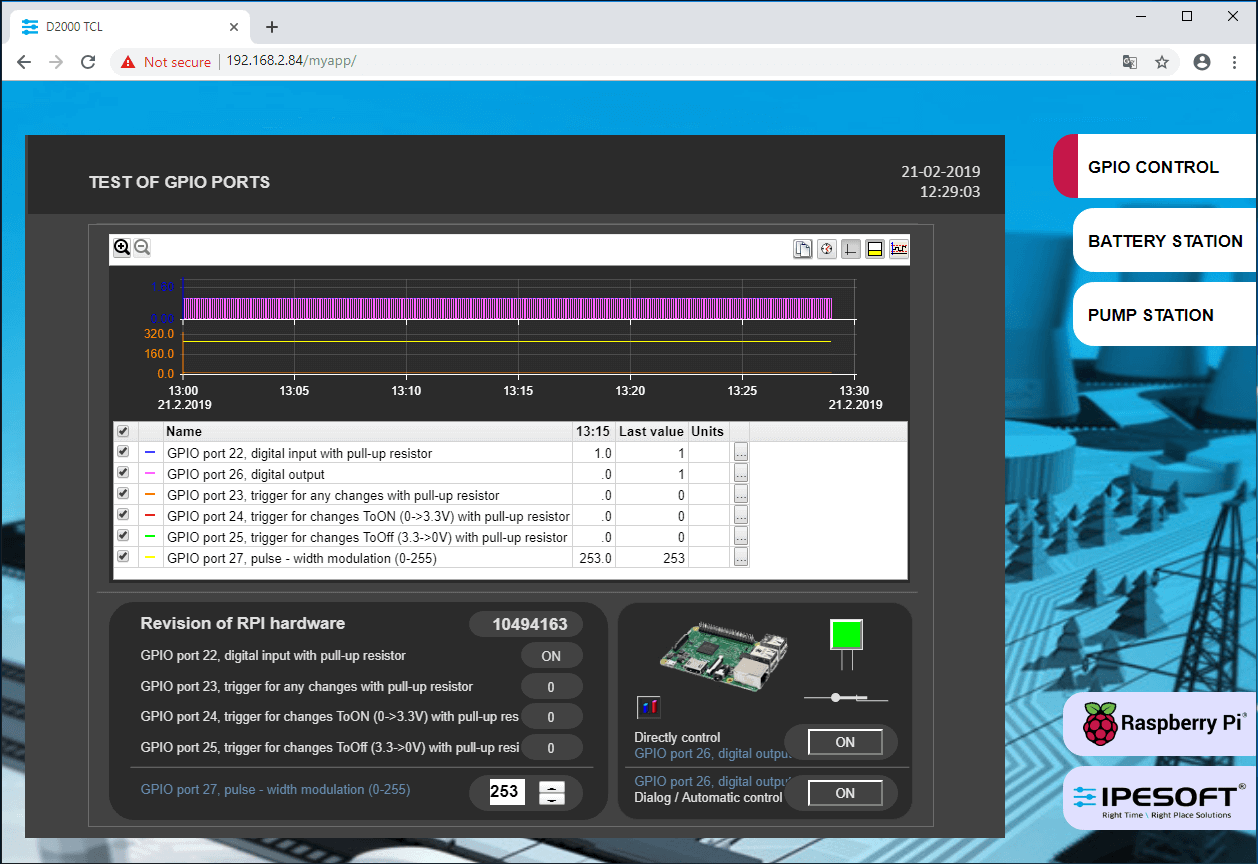
This way I verified that the thin client works on my computer.
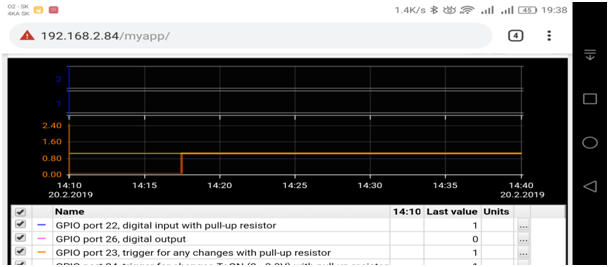
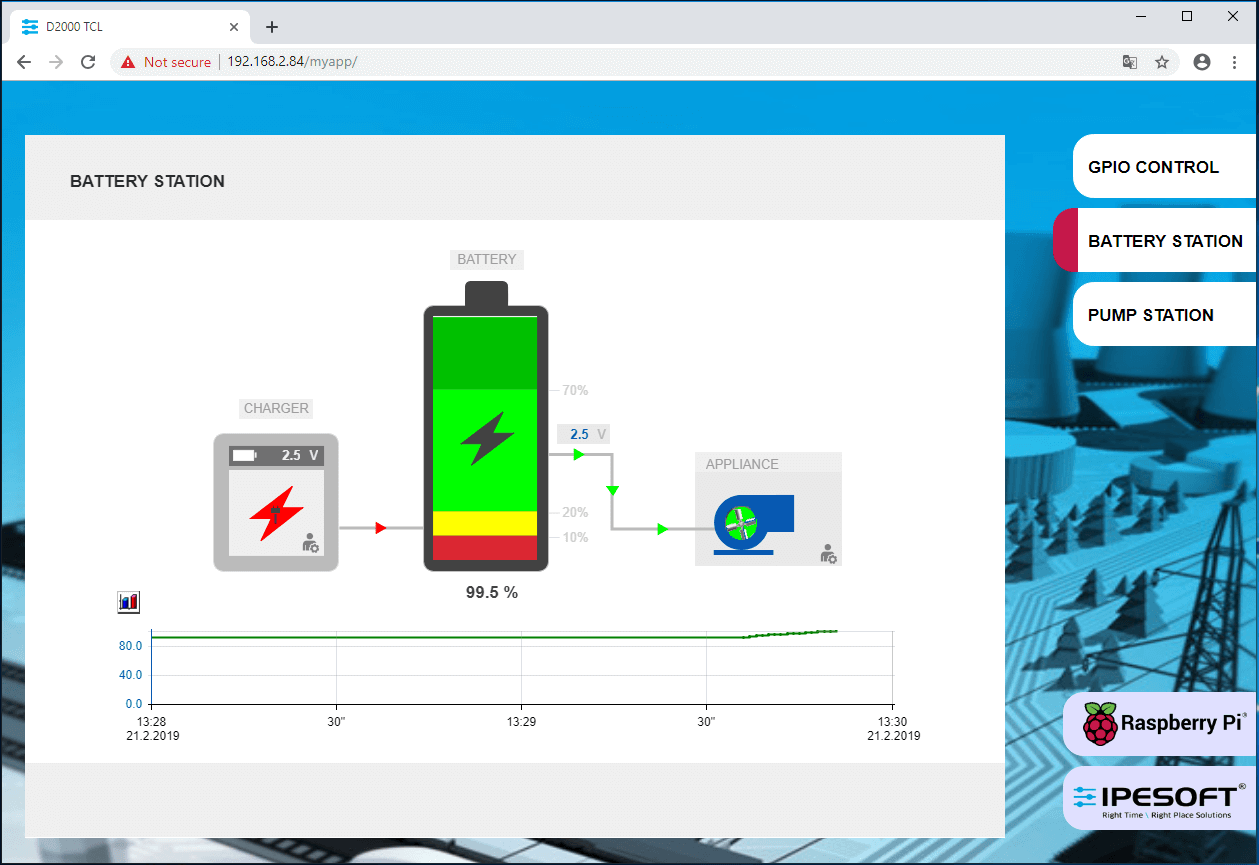
I tested the same at my mobile phone with an Android operating system connected to the home WiFi network.
After entering already familiar address http://192.168.2.84/myapp into my web browser on my Android…
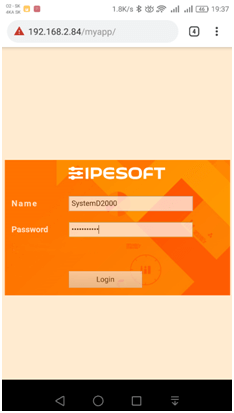
... and of course, after the necessary login to the D2000 application, this testing scheme showed up...
Accessing SCADA server with D2000 Windows Client
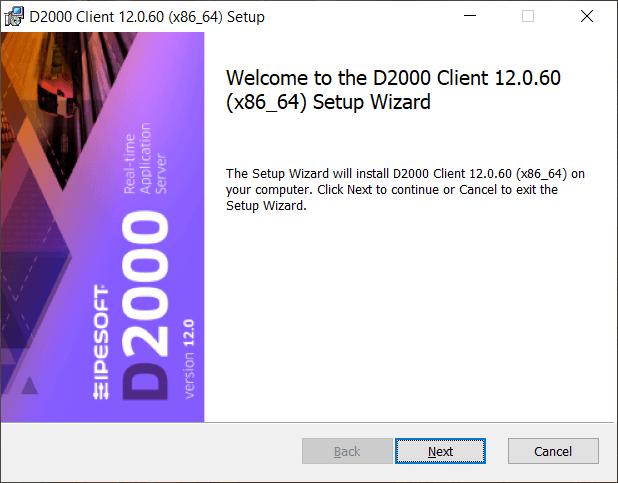
I needed to install necessary tools to not only display this preconfigured D2000 application myapp through a web browser but also to adjust it in some way according to my ideas. It is possible to login remotely by D2000 HI, D2000 CNF, GrEdit, Sysconsole and other tools. For such operations, I needed to download the D2000 developer client on my computer. I downloaded the 64bit version of client from download link next to RPI image download.
I launched the installation by running downloaded installer file. Welcome window showed up.
I left all further dialogs of the installer with the default values.
Only in the screen ‘Installation Configuration’, I changed the value of Host Name/IP Address parameter from localhost to the IP address of my RPI – 192.168.2.84 and network mask – 255.255.255.0.
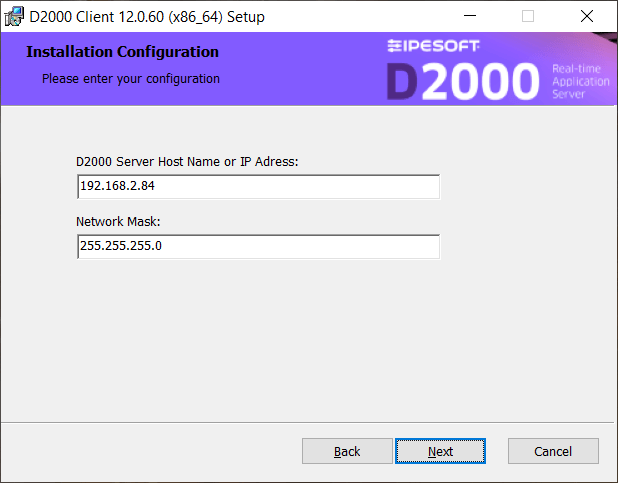
Further, I used default parameters of the installation again until the D2000 Client installation started copying files. After a short while, the D2000 Client installation was completed.
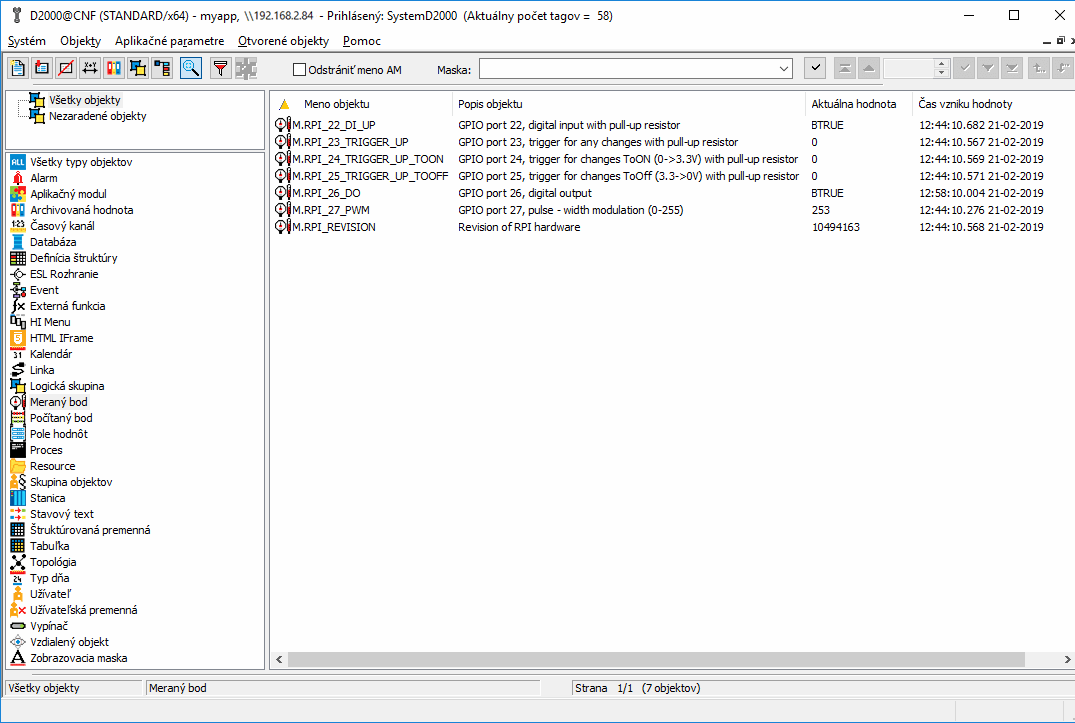
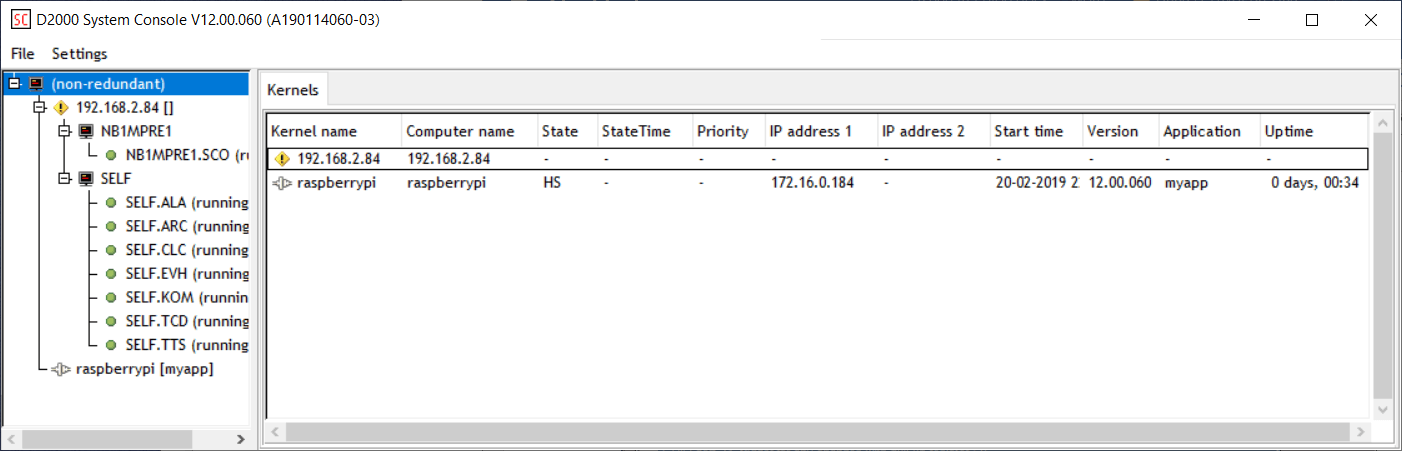
In Windows Start menu, the D2000 Client folder was created with links to D2000 HI, D2000 CNF, D2000 GREDIT, D2000 SysConsole, and D2000 Online documentation – those are the aforementioned necessary tools for monitoring and administration of D2000 applications.
By clicking on individual links and of course after logging in, I gained the access to view as well as configure the D2000 system running my the RPI. For example, after login into D2000 HI, the default scheme opens.

Finally, I can say that installing and basic configuration of D2000 on my RPI was surprisingly simple. Everything needed was well described in manual of D2000.
My first experiences with D2000 on RPI are very good. I’m looking forward to further experiments with D2000 on RPI.
Pavol Brezina, www.ipesoft.com
