
Today's blog will be dedicated to a tool invented and made available by my colleague Roman Peřich. This is a picture in D2000 that enables mass operations on D2000 objects (change of parent, renaming, cloning of objects, change of addresses of I/O tags and others).
In my opinion, this is a useful tool - both for the mentioned functionality and as an inspiration to study working with D2000 ESL - the tool includes work with XML export/import, with files, with structured variables, instance pictures and even calling RPC procedures and a "library" (ESL script of unit type). We have localized all texts using the D2000 Dictionary, so the picture is displayed with SK/CZ/EN texts depending on the language of the logged-in user.
Installation
Installing the XML Tool into any D2000 application is simple and consists of 3 basic steps:
1. Download xml_tool.zip and extract it.
2. XML Import of unpacked XML files into the running D2000 application (XML Import item in the D2000 Cnf or D2000 GrEdit menu).
3. Import the dictionary (Dictionary.csv) into the running D2000 application (Dictionary item in the D2000 Cnf or D2000 GrEdit menu and the "Import keys from file" icon in the Dictionary).
Using
Using the XML Tool has the following parts:
1. Action selection (copying, changing parent, renaming...)
2. Filling the list of objects to which the action will be applied (I/O tags, stations...)
3. Setting new object parameters
4. Execution of an action
The XML Tool main picture is named S.XML_Change.Tool.
After opening it looks like this:
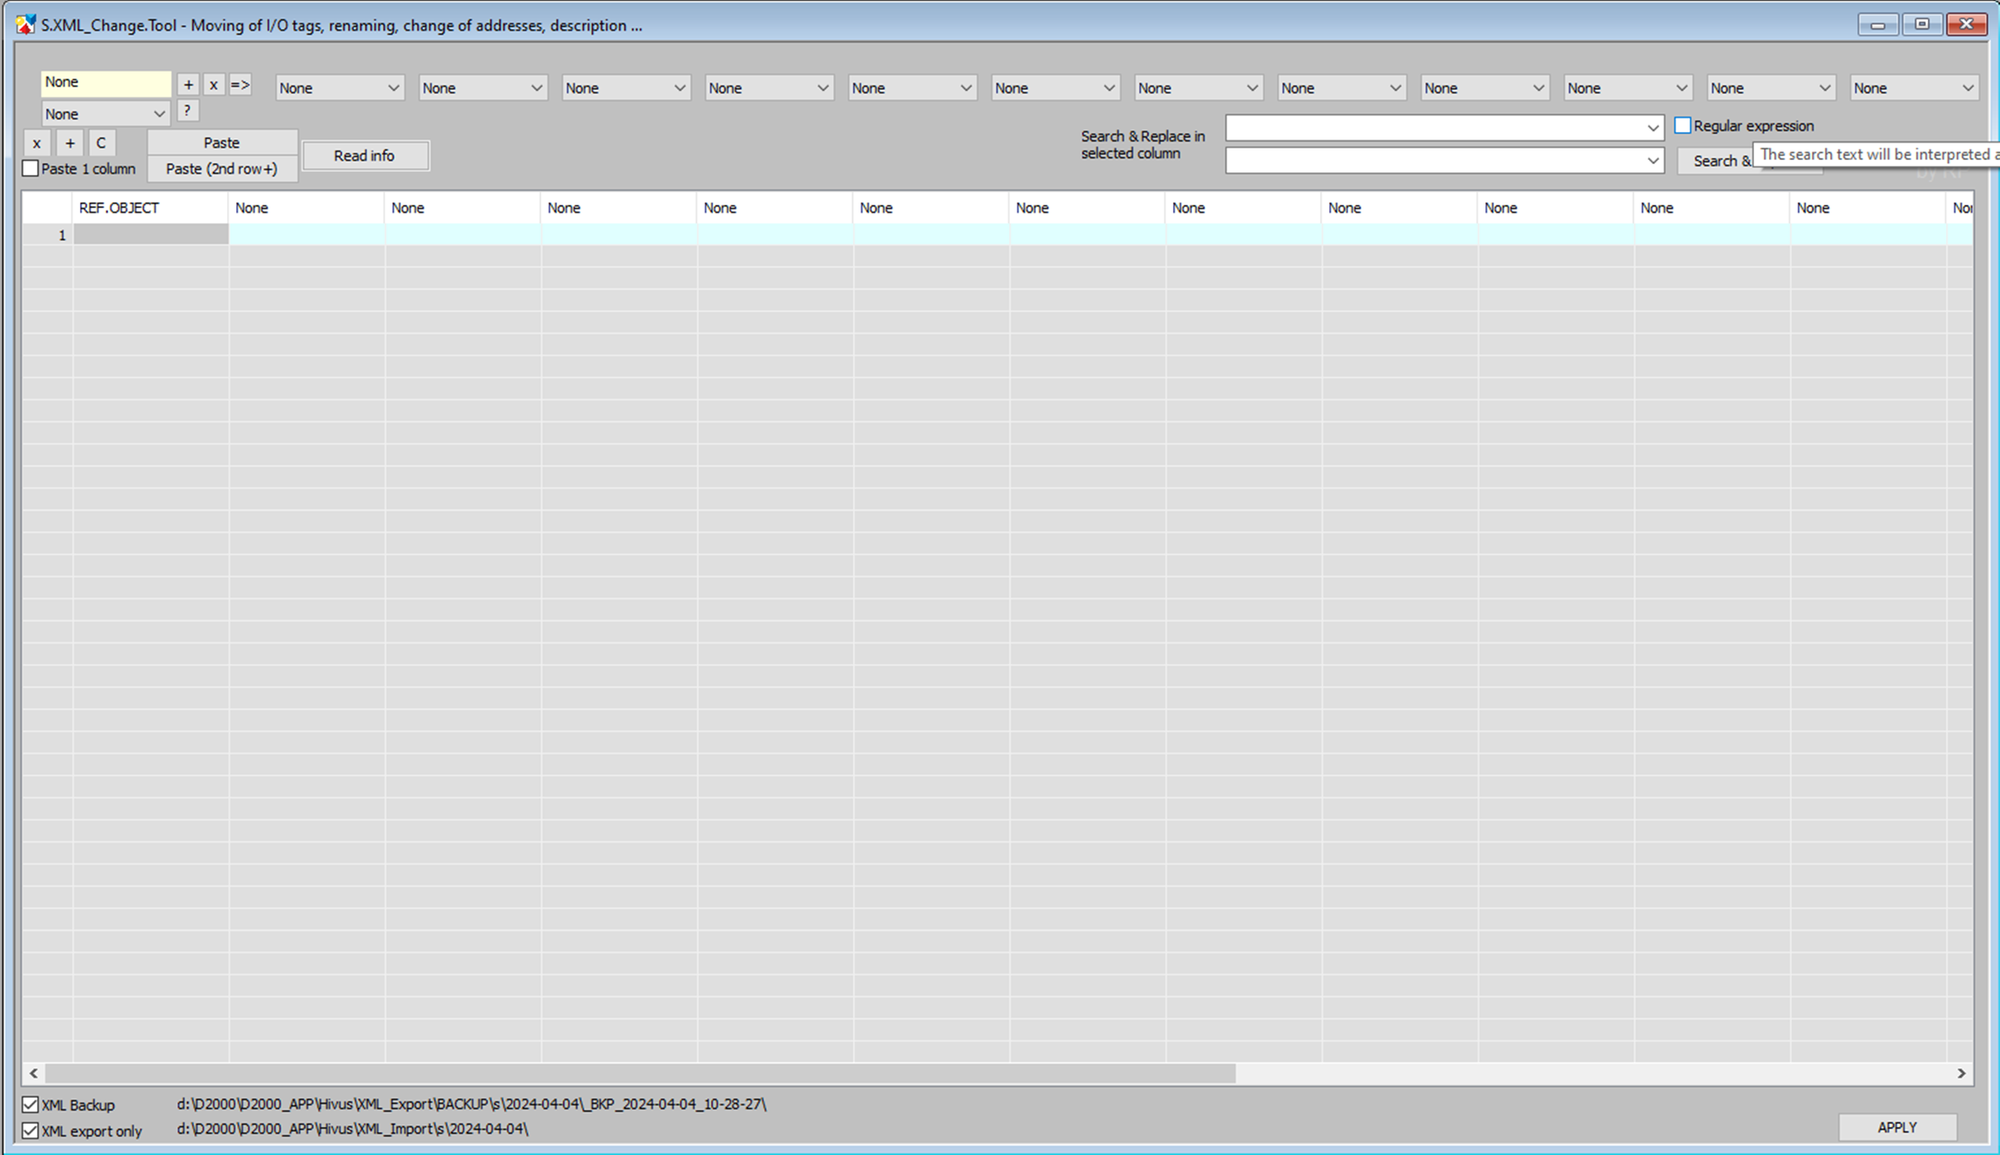
At the top left is a selection of actions (profiles). For example, there are:
- Clone (cloning/copying objects)
- Move
- Rename
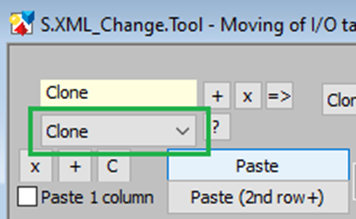
After selecting the action, a predefined list of changed attributes belonging to the action is set in the header. These attributes will be displayed in the browser for each object.

This list can be edited manually (attributes can be added and possibly the profile can be updated with the "=>" button).
After choosing an action, we can go to the displayed table of objects and fill it with objects on which we want to perform the corresponding action.
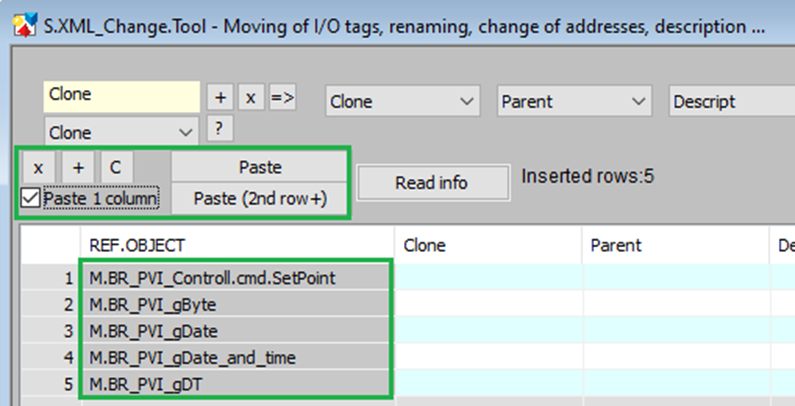
It is possible to get object names into the REF.OBJECT column in the following ways:
- By manual entry, It is possible to add additional lines, using the "+" button.
- By pasting from the clipboard (Ctrl+V).
- Select multiple lines and press "C" to duplicate them.
- Copy multiple objects in D2000 Cnf and paste them without the first row with the "Paste (2nd row+") button (D2000 Cnf inserts field names in the first row of the clipboard).
- Copy multiple object names from any text editor or MS Excel and paste them with the "Paste" button.
- By opening an auxiliary picture S.OBJ.Class.View for viewing D2000 objects. This has a selection list of object types on the left (in the case of processes and their descendants, e.g. communication lines and stations under the KOM process or databases under the DBM process) and on the right a list of objects of the relevant type (e.g. user variables), or a list of descendants of the process/line/station/databases. Above the object type selector, there is an entry field for filtering the list of objects according to the specified mask. By double-clicking on the item of the object type selector, the list of objects shown on the right is copied to the list in the S.XML_Change.Toolpicture.
It is possible to select multiple rows of the table by clicking on individual row numbers in the object table and then delete them with the "x" button.
Note: Selecting multiple rows in the object table (or in MS Excel), or selecting multiple objects in D2000 Cnf, can be done by selecting a contiguous list using Shift + mouse click, or selecting discrete rows using Ctrl + mouse click.
The default column for insertion is REF.OBJECT, clicking on the header of another column will insert it into the selected one (and the following). If the option "Paste 1 column" is checked, only the selected column is used.
After filling the list of objects and clicking on the "Read info" button, the other displayed columns will be filled.
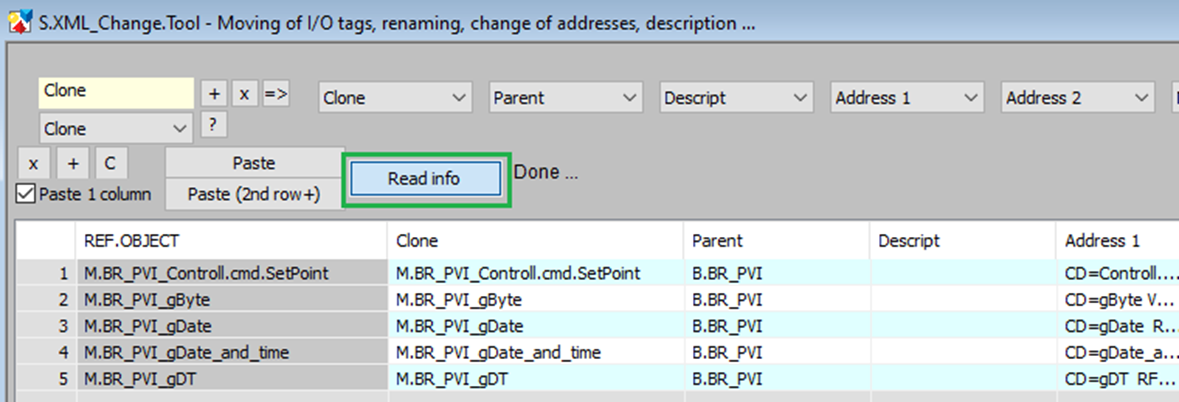
Now we can set new object parameters. For example, when cloning I/O tags, it is necessary to change the name (Clone column) and it is also possible to change the parent (Parent column) and possibly the addresses. Changes can be made by manual editing, marking the relevant column and pasting from the clipboard ("Paste" button), or using the Search & Replace section.

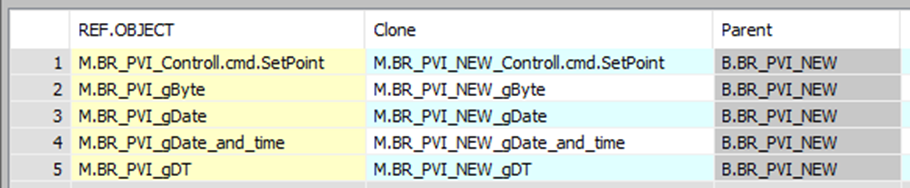
Clicking on the Clone column selects it as the replacement target. We specify replacing the string "BR_PVI" with "BR_PVI_NEW" and press the "Search & Replace" button. We then select the Parent column and press the button again. The following screenshot shows the result.
The last step is to perform the action with the "APPLY" button. There are two settings to the left of the button.

The "XML Backup" setting causes a backup to be performed using an XML export of the original object configuration to the displayed directory. Should an "UNDO" be needed, it is possible to restore the original configuration of D2000 objects by importing the XML backup.
Setting "XML export only" will cause changes to be applied to XML exported files, but no XML import will be performed. The changed files will be saved in the displayed directory. They can be reviewed and imported manually (using D2000 Cnf or D2000 GrEdit).
Conclusion
XML Tool is a tool that simplifies mass editing and copying of D2000 objects and allows you to conveniently perform editing operations for which we used XML or CSV export/import until now.
I hope that people configuring the D2000 will like this utility and possibly come up with other possible improvements to it.
April 10, 2024, Ing. Peter Humaj, www.ipesoft.com
