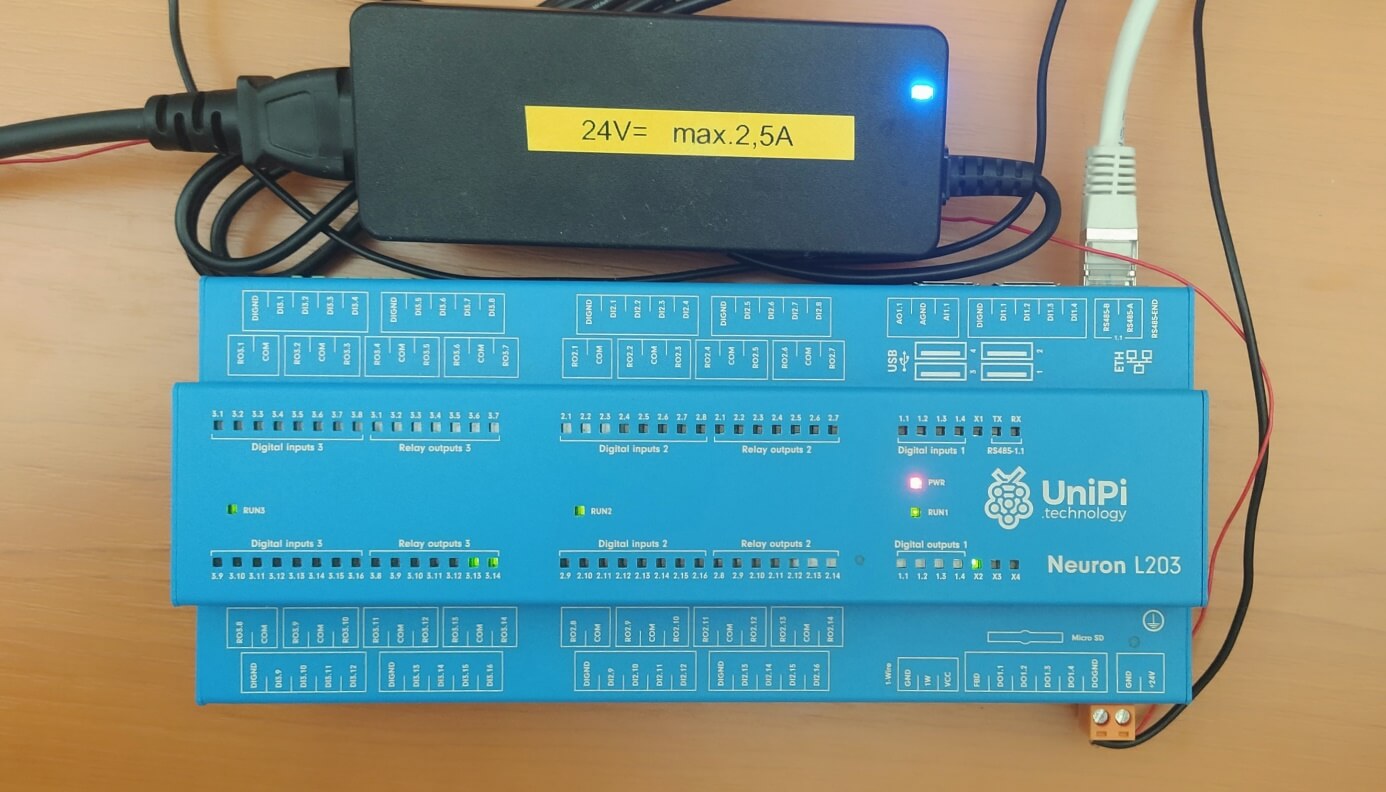
Ipesoft D2000 realtime application server offers various communication protocols that can communicate with many different devices. In this blog, I will focus on a specific PLC – Unipi Neuron L203. This is a Raspberry PI – based PLC, containing a RPI 3 plus industrial peripherals (digital and analog inputs/outputs, relay outputs) and one RS-485 serial port.
To start D2000 on Unipi Neuron, it is necessary to download an OS image from the Unipi site and flash it on the SD card using e.g. Win32 Disk Imager. EVOK - the Unipi control software is used as a communication tool. It implements a Modbus TCP server.
First, it is needed to download a D2000 installer for ARM Linux (which is currently unavailable for the public) and copy it to the Unipi. When I unzipped the installer, I ran a ./doinstall scrip which installed D2000 on the Unipi.
Before D2000 is used, it is necessary to install the PostgreSQL database and PostgreSQL ODBC driver:
1. To install the PostgreSQL server, run: sudo yum install postgresql-server postgresql-contrib
2. To initialize the database, run: sudo postgresql-setup initdb
3. To start PostgreSQL, run: sudo systemctl start postgresql
4. Turn on automatic PostgreSQL startup after OS startup: sudo systemctl enable postgresql
5. To install the PostgreSQL ODBC driver, run: sudo yum install postgresql-odbc
Create a new user with the command
adduser <username> - where <username> is the user name of your choice. Later, during the installation you will be asked for the name of the user with whose rights the D2000 will run, enter this created user.
Before the new application is created, recommendation is to change the way how to obtain the IP address. Instead of using a DHCP server it is recommended to use a static IP address or at least to reserve an IP address to MAC address on your DHCP server. After the IP address is assigned I installed D2000 from the file.
New application could be created on the Unipi Neuron by ./d2app script in /opt/d2000/bin folder. In the installation process, there are a few options that can be left in a default state. I changed only an IP address to the assigned IP address of the device.
Modbus
Modbus is one of the simplest communication protocols (and probably thanks to this, it is still in a widespread use). The Modbus protocol was designed in 1979 at Modicon to communicate with their PLCs as a simple master-slave serial protocol. Modbus supports 4 Basic types of objects:
· Coils (1-bits binary states)
· Discrete Inputs (1-bits read-only binary inputs)
· Holding register (16-bits analog states)
· Input registers (16-bits read-only analog inputs)
The protocol defines functions for reading of each object type and writing to non-read-only types:
· Coils: Read Coils (1), Write Single Coil (5)
· Discrete Inputs: Read Discrete Inputs (2)
· Holding register: Read Holding Registers (3), Write Single Register (6)
· Input registers: Read Input Registers (4)
The protocol uses single-byte addresses of the slave device (by default 1-247, higher addresses are reserved), address 0 is a broadcast. So there can be multiple devices on a serial line, each of which must have a unique address. In case of Unipi Neuron L203, according to the Modbus map, it can have one universal Unit with the address 0 or each subunit of the PLC can be addressed by a specific address.
D2000 Modbus configuration
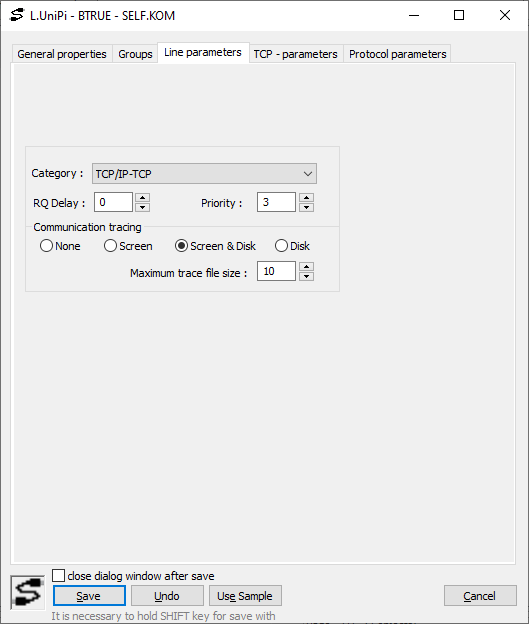
The line configuration is the first step for communication. In the Line configuration window there is a Line parameters tab where the category of the line has to be changed to TCP/IP-TCP, as we want to use a TCP connection to the EVOK Modbus server. In this tab the communication tracing could by turned on which can be useful for tracing of the specific communication. If Screen & Disk option is chosen, the diagnostic outputs are displayed both on the screen and they are saved in a text file. The output file line_name.LOG is placed in the trace subdirectory of the application directory.
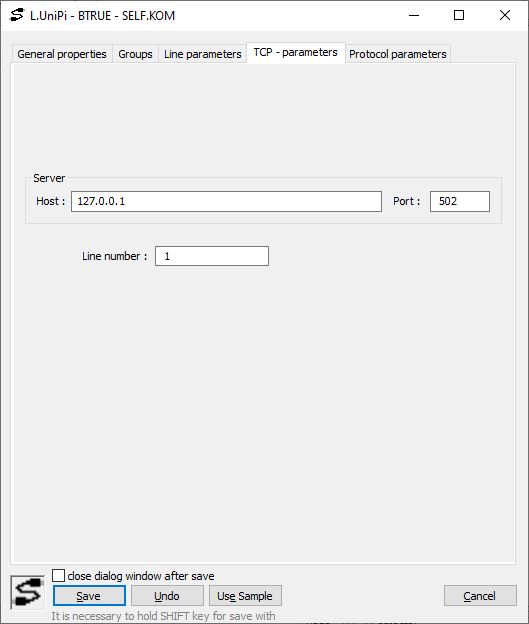
In the TCP – parameters tab there is a field for host and port. The default port for Modbus is 502. In case of EVOK, it communicates on a loopback address (Host – 127.0.0.1).
Stations are representing PLC units or there could be only one station with address 0 which is a broadcast address in Modbus protocol. In the Station dialog window there is the Parameters tab where communication protocol must be configured, in this case, it will be Modbus Client.

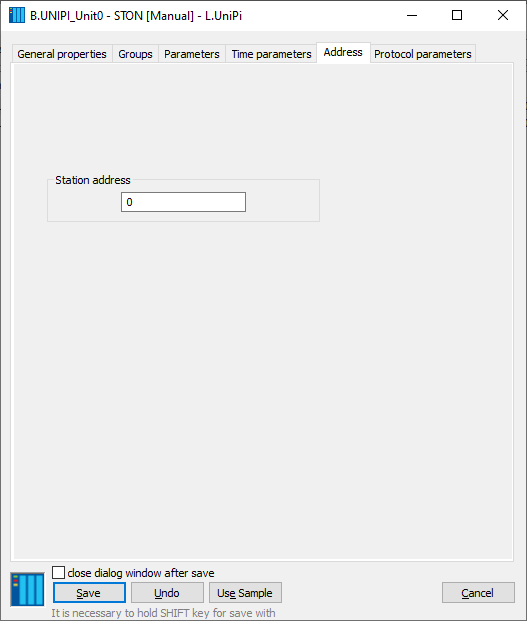
In Time parameters tab there is an option for setting the Delay between two successive polls, which should be 1 second or more. In Address tab there is a Station address field which represents the unit address. Neuron L203 has four possible settings for the unit address:
· 0 – broadcast for every unit
· 1 – for unit 1
· 2 – for unit 2
· 3 – for unit 3
I/O tags addressing
If the Unit 0 station is in use, according to the Neuron L203 Modbus map, every I/O tag has a different address. In case of using a separate Station for each unit, addresses are the same for all I/O tags on a Station. In D2000, addressing is really simple. Address format is:
[I|U|Uu|Ul|f|F|L|Ll|S|Sl|B|X|sn.|an.|An.][d|D][b][s]RdFn[-WrFn[d]].Address[.BitNr]
• The first character defines I/O tag type, for example, I – integer16, f – float, B – unsigned Byte, and many others.
• Modifiers d and D indicate that number is an 8-byte number. Modifiers allow configuration of the 8-byte integers with/without a sign.
• Modifier b indicates that figure is BCD encoded.
• Parameter RdFn is a function of Modbus protocol for data reading: For example:
1 – Read Coils
3 – Read Holding Registers
• Parameter WrFn is the function of Modbus protocol for data writing. For example:
5 – Write Single Coil
6 – Write Single Register
• The next parameter d activates the function “delayed write”.
• Parameter Address is a 2-byte address of register (0 – 65536).
• Parameter BitNr is a number of bit in a word, if separate bits need to be addressed
Example of address configuration:
• 1.10 - the function Read Coils (1) reads the binary status value with address 10.
• 3.1 – a 16-bit signed number is read by the function Read Holding Registers (3) from the address 1 (it can be also in the form I3.1).
• U3.1 – a 16-bit unsigned number is read by the function Read Holding Registers (3) from the address 1.
• I3-6.1000 – a 16-bit signed number is read by the function Read Holding Registers (3) from the address 1000 and is written by the function Write Single Register (6).
Conclusion
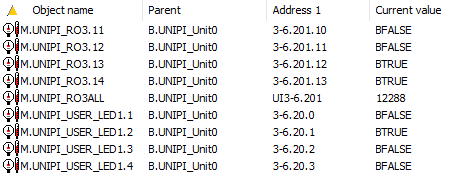
After all these steps D2000 is able to communicate with Unipi Neuron and read/write from/to Neuron L203 I/O tag.
Marek Bodorík, www.ipesoft.com
